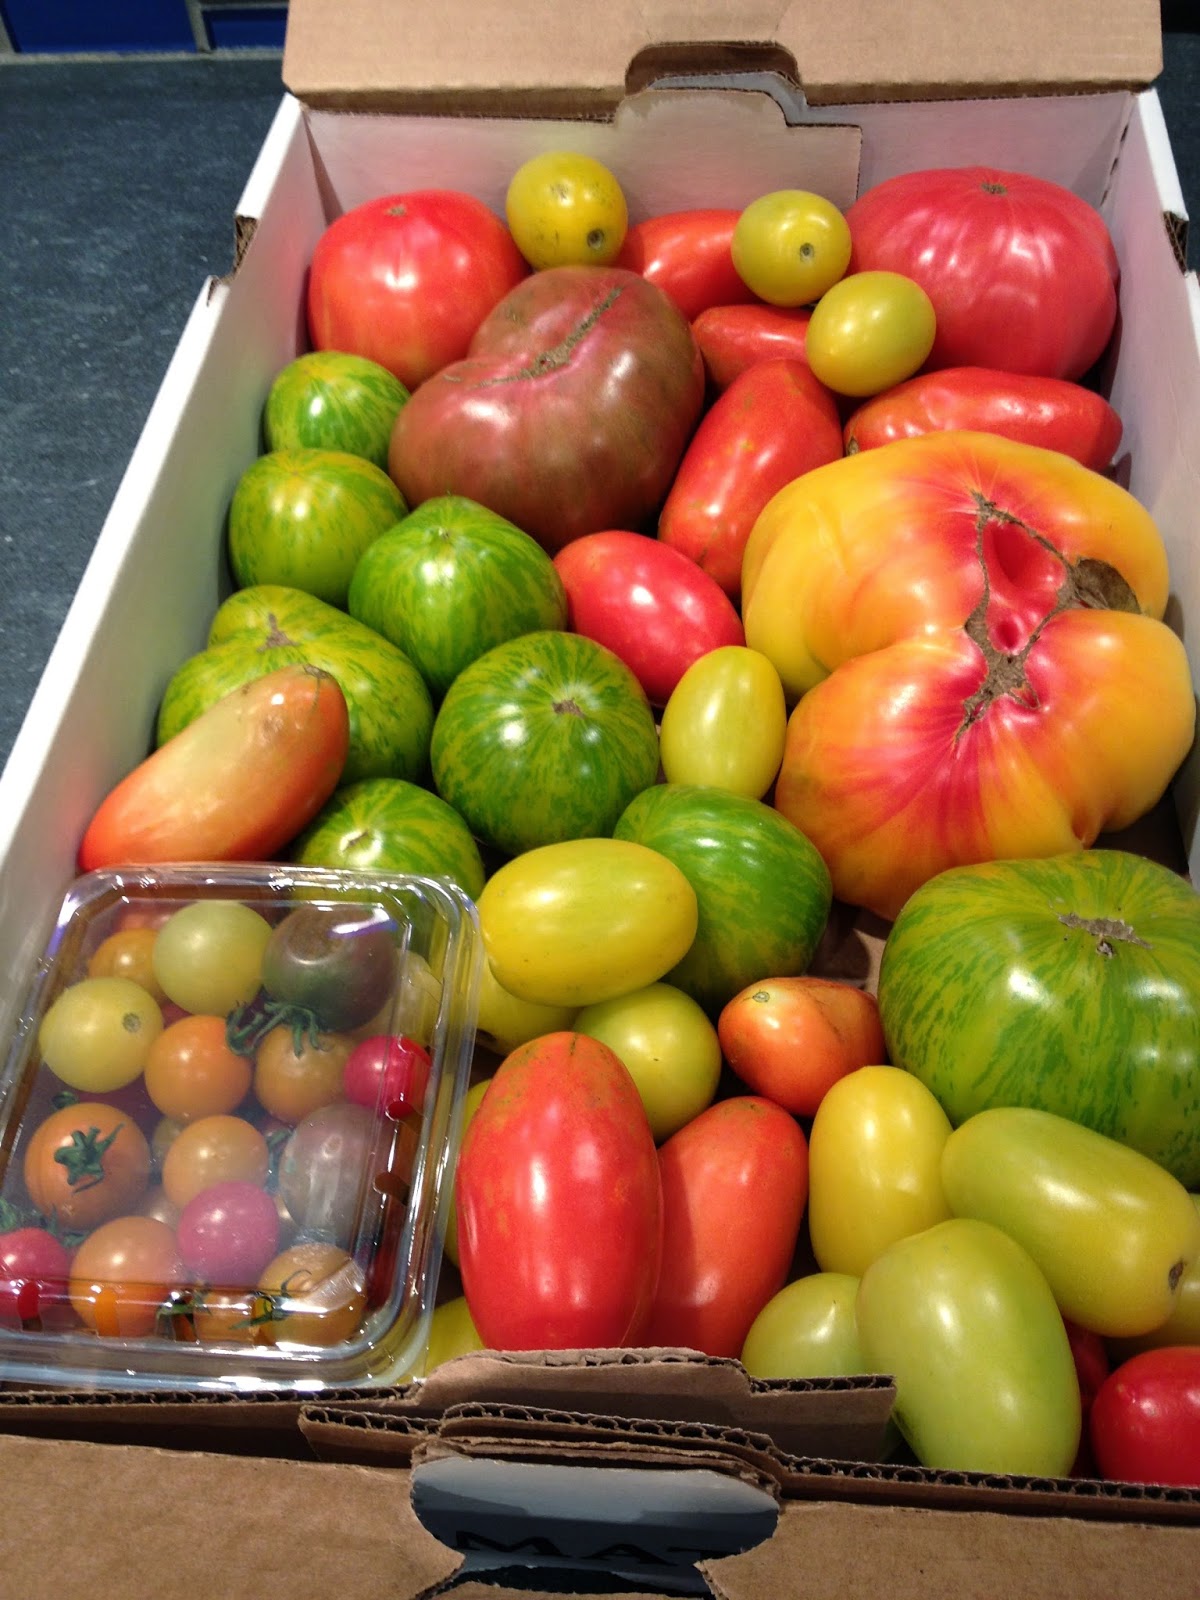
During tomato season, I like to make a fresh tomato sauce for pasta. I've seen some recipes that call for just mixing chopped tomatoes into pasta, but I prefer to cook the tomatoes to make them more sauce-like.
I started with onion slices, which I sauté in olive oil for about 5 minutes on their own at a medium-low heat.
Then I added some thinly sliced red pepper and sautéed for another 5 minutes.
While the onions and peppers are cooking, chop your tomatoes. I used plum tomatoes, mostly red. I had a yellow plum tomato that was turning, so I used it as well.
Add the tomatoes and simmer at a low heat for at least 10-15 minutes. If you're in a rush, cook your pasta now. If you have time, wait for a bit.
I had the time to wait. After cooking the tomatoes on the center burner for about 20 minutes, I moved them off to a side burner on the lowest heat and covered the pan, to let them simmer longer.
Once your pasta is cooked, add it to the pan. Cook the pasta in the sauce for a minute.
Ready to serve...
...with some cheese, of course.
Tuesday, September 9, 2014
Sunday, September 7, 2014
Drying tomatoes
Drying tomatoes is a good way to store some of the summer for the colder months. You should pick a day where you're planning to be around the house, as it takes many hours to dry the tomatoes, and you need to start checking them after the first couple of hours to remove any that have fully dried.
While you can dry any tomato, I started with a large colander of cherry and grape tomatoes.
Cut the tomatoes in half and place cut side up on a cookie sheet. Note that the tomatoes will discolor your pan a bit (very shiny where the tomatoes were, discolored where they weren't), but it doesn't ruin the pan. If you care about having your pans be uniformly shiny, you might want to put down aluminum foil or parchment paper, although I've not tried using either of these.
I put the trays in an oven set at 200 degrees. Much higher and the tomatoes will roast, rather than dry out. I add the trays to the oven as I finish each one. After about 45 minutes of cutting tomatoes and arranging them on the cookie sheets, I had three trays of tomatoes in the oven.
After 2-3 hours, I start to look at the trays 30 minutes to check on how the tomatoes are drying. The smaller ones will dry first; pull them off the tray into a bowl on the counter before putting the tray back into the oven to continue drying the rest. If you want the process to go a bit more quickly, try 250 degrees, but then be sure to check the tomatoes more often.
I like to leave the tomatoes soft; I don't dry them to a crisp.
After over 7 hours in the oven, I decided that I wanted to be done with drying tomatoes for the day. I took the tomatoes that had dried the least and put them into a jar. Then I added olive oil to the tomatoes in the jar. I'm planning to use these tomatoes and the oil to make a dried tomato pesto in the next week or so. (Don't leave dried tomatoes in oil in your fridge for more than a couple of weeks. The first year I dried tomatoes, I stored all of them in oil in the fridge. I ended up having to throw away several jars of tomatoes that had gone bad, which was very sad.)
Instead, store your dried tomatoes in bags in the freezer.
I use them on pizza, in quiche, blended with feta cheese as a spread, and to make dried tomato pesto. They are also good as a snack (particularly when you're pulling them off the trays when first dried).
While you can dry any tomato, I started with a large colander of cherry and grape tomatoes.
Cut the tomatoes in half and place cut side up on a cookie sheet. Note that the tomatoes will discolor your pan a bit (very shiny where the tomatoes were, discolored where they weren't), but it doesn't ruin the pan. If you care about having your pans be uniformly shiny, you might want to put down aluminum foil or parchment paper, although I've not tried using either of these.
I put the trays in an oven set at 200 degrees. Much higher and the tomatoes will roast, rather than dry out. I add the trays to the oven as I finish each one. After about 45 minutes of cutting tomatoes and arranging them on the cookie sheets, I had three trays of tomatoes in the oven.
After 2-3 hours, I start to look at the trays 30 minutes to check on how the tomatoes are drying. The smaller ones will dry first; pull them off the tray into a bowl on the counter before putting the tray back into the oven to continue drying the rest. If you want the process to go a bit more quickly, try 250 degrees, but then be sure to check the tomatoes more often.
I like to leave the tomatoes soft; I don't dry them to a crisp.
After over 7 hours in the oven, I decided that I wanted to be done with drying tomatoes for the day. I took the tomatoes that had dried the least and put them into a jar. Then I added olive oil to the tomatoes in the jar. I'm planning to use these tomatoes and the oil to make a dried tomato pesto in the next week or so. (Don't leave dried tomatoes in oil in your fridge for more than a couple of weeks. The first year I dried tomatoes, I stored all of them in oil in the fridge. I ended up having to throw away several jars of tomatoes that had gone bad, which was very sad.)
Instead, store your dried tomatoes in bags in the freezer.
I use them on pizza, in quiche, blended with feta cheese as a spread, and to make dried tomato pesto. They are also good as a snack (particularly when you're pulling them off the trays when first dried).
Friday, September 5, 2014
What's in the box, 9/4/14 edition
Two boxes again this week: the supplemental tomato share...
...and the regular half bushel box.
This week's box had carrots, red oak leaf lettuce, fennel, lots of cucumbers, two tomatoes, arugula, rainbow chard, garlic, and two yellow (?) bell peppers. The farm newsletter said that the peppers should be red, but these definitely seem yellow, not yellow on the way to red.
Several cucumbers were quite large. I plan to make quick pickles of them.
We also grilled on Thursday night. I had to take a photo of the beets, as they were very pretty.
Post-grilling. On this plate of grilled vegetables are red peppers, eggplant, broccoli, onion, cucumbers , and tomatillos. I have not grilled tomatillos before. While raw tomatillos have a citrus-like taste, similar to lime, the grilled tomatillos became very fruity, almost melon-like. I don't think I'd grill them again to eat on their own, but grilled tomatillos might work for some recipe; I just don't know what at this time.
...and the regular half bushel box.
This week's box had carrots, red oak leaf lettuce, fennel, lots of cucumbers, two tomatoes, arugula, rainbow chard, garlic, and two yellow (?) bell peppers. The farm newsletter said that the peppers should be red, but these definitely seem yellow, not yellow on the way to red.
Several cucumbers were quite large. I plan to make quick pickles of them.
We also grilled on Thursday night. I had to take a photo of the beets, as they were very pretty.
Post-grilling. On this plate of grilled vegetables are red peppers, eggplant, broccoli, onion, cucumbers , and tomatillos. I have not grilled tomatillos before. While raw tomatillos have a citrus-like taste, similar to lime, the grilled tomatillos became very fruity, almost melon-like. I don't think I'd grill them again to eat on their own, but grilled tomatillos might work for some recipe; I just don't know what at this time.
Tuesday, September 2, 2014
Salad bar: tomatoes, many ways
So many ways to eat tomatoes....
Here is a caprese salad that includes avocado slices and some balsamic glaze, made by a friend when we visited their house a few weeks ago.
Sometimes I just slice up the beautiful tomatoes, then add salt and a touch of olive oil. We served this dish of tomatoes with burrata from Maplebrook Farm in Vermont.
Cherry tomatoes with basil and feta. Dressed with pepper and olive oil. (No salt, as the feta is salty enough.)
Panzanella, to use up some old bread. Cubes of bread on the bottom, the chunks of tomatoes, sliced of cucumber, chopped basil, and some chopped Kalamata olives.
Dressed with balsamic vinegar (which I add first to soak into the bread), olive oil, salt and pepper.
I made a large batch of marinated zucchini recently, and we had some leftover in the fridge. I mixed it with arugula, tomatoes, and blue cheese. I added a small amount of olive oil, but didn't need much, as there was some marinating liquid (balsamic vinegar and oil) on the leftover zucchini.
Here's the salad after stirring. Husband didn't care much for this salad. I think the mint on the zucchini might have made the salad a bit odd. The mint works well with the zucchini on its own, but I wouldn't normally add chopped mint to a salad like this.
Finally, tomatoes on a plane. Some of the cherry tomatoes from this week's box were eaten at 35,000+ feet above the ground.
Why did I fly with tomatoes this weekend?
To earn a medal in the Disneyland Half Marathon and the Coast to Coast medal for completing the WDW and DL Half Marathons in the same year. I'm not fast, but I finished.
Monday, September 1, 2014
Potato weekend: Labor Day holiday extra
Since we have a long weekend due to the Labor Day holiday, I thought I'd conclude with one last day of potato weekend, featuring some of the husband's creations.
He called the following his "Steak dinner": "Steak. [Beef]Steak tomatoes. Mashed potato with scallions and black garlic and cayenne made to look like a steak."
The photo below includes roasted potatoes with rosemary and scallions, based upon the recipe posted a few days ago for roasted potatoes with onions and rosemary. Husband states, "That's how you take a picture of some potatoes. By adding steak to it."
While we might disagree on the need for steak on the plate, he did make a couple of nice potato dishes.
Hope you have been enjoying the long weekend. I can't believe it's September today.
Sunday, August 31, 2014
Potato roast
Continuing the potato weekend theme: My sister-in-law visited recently and introduced me to Smitten Kitchen's crispy potato roast.
You start with four pounds of potatoes. Peel them and slice thinly. If you have a mandolin, use it; I don't, so I just cut the potato slices as thinly and as regularly as I could.
Be sure to put the oil on the bottom and sides of the casserole dish before you put the potatoes in. I didn't, and there was some sticking.
Here's the casserole after all of the potatoes have been stuffed into the casserole dish. (Seriously, I ended up jamming in a couple of the last small potatoes, unwilling to let any slices go unused.) Onions have been inserted between some of the potato slices, then salt and red pepper flakes were added. (Next time, I'd salt the dish more. We just sprinkled salt on. I wasn't paying attention to the recipe, as I had someone with me who was experienced with it.)
After an hour and fifteen minutes, thyme is added to the top of the baking dish.
Then you continue cooking until the tops are crispy, about another half hour in our case. We probably could have let the potatoes cook another 10-20 minutes to crisp more, but it was getting late. It ends up taking well over two hours from potato peeling to having the dish on the table, so be sure to start this much earlier than I did. That said, I'm not sure that I'd like the dish with more crisping. While the recipe describes the crispy pieces as being like potato chips, I found some of the crispy parts a bit more reminiscent of the dried out potato slices in a box mix of au gratin potatoes (which I definitely do not eat now, but did make as a child when eating with my parents).
Four pounds of potatoes sounds like a lot to me, but four adults made a pretty sizable dent in this dish. We had about 3 small potatoes worth of slices left, which we had as leftovers a few days later. I fried the eggs in some butter to crisp them up, then served with a couple of sous vide eggs.
Husband added some leftover brisket to his potatoes and eggs.
We ate the potatoes and eggs for dinner, not breakfast, because breakfast for dinner is a great treat for me.
You start with four pounds of potatoes. Peel them and slice thinly. If you have a mandolin, use it; I don't, so I just cut the potato slices as thinly and as regularly as I could.
Be sure to put the oil on the bottom and sides of the casserole dish before you put the potatoes in. I didn't, and there was some sticking.
Here's the casserole after all of the potatoes have been stuffed into the casserole dish. (Seriously, I ended up jamming in a couple of the last small potatoes, unwilling to let any slices go unused.) Onions have been inserted between some of the potato slices, then salt and red pepper flakes were added. (Next time, I'd salt the dish more. We just sprinkled salt on. I wasn't paying attention to the recipe, as I had someone with me who was experienced with it.)
After an hour and fifteen minutes, thyme is added to the top of the baking dish.
Then you continue cooking until the tops are crispy, about another half hour in our case. We probably could have let the potatoes cook another 10-20 minutes to crisp more, but it was getting late. It ends up taking well over two hours from potato peeling to having the dish on the table, so be sure to start this much earlier than I did. That said, I'm not sure that I'd like the dish with more crisping. While the recipe describes the crispy pieces as being like potato chips, I found some of the crispy parts a bit more reminiscent of the dried out potato slices in a box mix of au gratin potatoes (which I definitely do not eat now, but did make as a child when eating with my parents).
Four pounds of potatoes sounds like a lot to me, but four adults made a pretty sizable dent in this dish. We had about 3 small potatoes worth of slices left, which we had as leftovers a few days later. I fried the eggs in some butter to crisp them up, then served with a couple of sous vide eggs.
Husband added some leftover brisket to his potatoes and eggs.
We ate the potatoes and eggs for dinner, not breakfast, because breakfast for dinner is a great treat for me.
Saturday, August 30, 2014
Spanish tortilla
Continuing the potato weekend theme, I recently tried Food52's Spanish tortilla recipe. (Rather than copy it here, I'll leave it for you to click through to it.)
I started with 2 pounds of yukon gold potatoes...
...which I peeled and boiled for about 20 minutes. They then had to cool before slicing.I sautéed an onion in olive oil. (In my opinion, the recipe uses too much oil. I'm going to reduce it next time.)
Here are the sliced potatoes going into the egg mixture...
...and after stirring...
...then poured into the cast iron pan. See the floating oil on top? Too much oil.
The recipe calls for parmesan cheese to be sprinkled on top. I think it would have been better mixed into the egg mixture. As it was, it could have been skipped, as you couldn't really taste it.
Here's the tortilla after removal from the pan...
...and after a few slices have been removed.
I ate it with some tomatoes and blue cheese. Husband had a steak as well.
The next time I make this recipe, I'd like to try sautéing some peppers (red or green) with the onions. It's not traditional, but I think it'd add some nice flavor.
Subscribe to:
Posts (Atom)